How to make a GIF: recording

How to make a GIF: the tools

I usually use FireFox to record MLB.TV with FRAPS. When you launch a game using MLB.TV it opens it’s own Flash player window. Flash is recordable, the rest of FireFox is not. For ESPN3 and some other stuff I used to us Chrome, because FRAPS would record the entire browser window. Unfortunately, it looks like an update to Chrome has taken that function away. If I manage to get it working again I'll make sure to update this post.

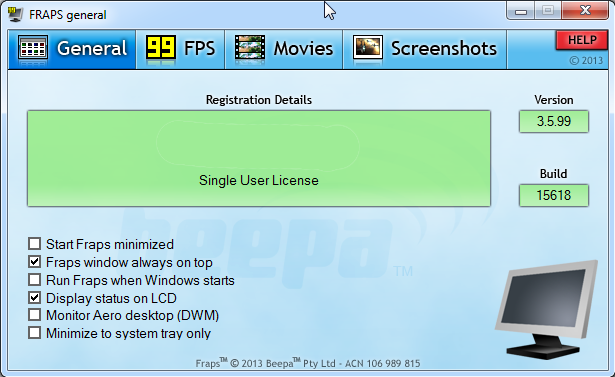
When FRAPS is launched there will be taps for Frames Per Second (FPS) display, Movies and Screenshots.

On the FPS tab, You can hide the FPS or place it one of the four corners of your browser. I like to have it up so I can see when it’s recording and when it’s not. When Fraps is recording it will turn the FPS numbers red and record at the rate you have selected. I record at 30 FPS. I’ve found that any higher you’ll start to get into some performance issues and space issues with your computer. Any lower and you’re taking some quality hit. What’s best for you may depend on your hardware. Feel free to play around with the setting, but I’ve found 30 FPS to be the sweet spot for me.

I would recommend that you set the storage setting to break up your recorded video to 4GB increments. You can put it all in one big file, which is fine for short videos, but sucks for a three hour long game that you might need to go back through. 4GB increments will make it much easier to find and trim your video.

For recording you’ll want to set a hotkey. Go to the Movies tab and click in the 'Video Capture Hotkey' field. Then type the key you want to set as your hotkey. When you want to record hit the hotykey and you should see the color of the FPS numbers change from yellow to red, indicating the recording has started. A three hour game will fill up your hard drive quickly so make sure you have plenty of hard drive space to do the recording, if you intend to record the whole game. I have a 4TB drive that I use for my recording and that lasts me several games. Which has come in handy when GIF requests were made for several games back.

And that's recording in a nutshell. Leave questions or comments on the software you use for recording video in the comment section below.

Tweets worth mentioning August 25, 2014

Learning a new Language, Spanish

Monday I took my Spanish placement exam. I am down to the last two semesters of my college career and I needed to take three Spanish courses to graduate. I've been putting off Spanish classes because they're one of the classes that are almost always offered in the evenings and being a part time student that's invaluable.

Resources

Anyways, I probably should have done this sooner, but I didn't. A few years ago I decided that i would try to place out of some Spanish but buying Rosetta Stone and studying my butt off over the summer. This past Winter I bought the Rosetta Stone for half price and spent this entire Summer studying 30 minutes to two hours a night four to five days a week.

I supplemented that with a free language learning website called Duolingo. The setup is pretty good and I got the hang of it really quickly. I typically used my lunch breaks to work through the site, but also used the site pretty extensively on my final day of studying. One of the great things is that once you've learned about 50% of the language you can work on real world examples, by helping the site translate them. You can do the translating yourself or review translations from other people and either up vote, down vote or edit a translation. It's a really good resource, especially for the price.

Two other resources I utilized in my studying was Spanish baseball broadcasts and Twitter. Spanish baseball broadcasts are good, because they use a lot of baseball terms I was able to understand and use as points of reference. Twitter also makes for a good reference point, as it gave me a gauge on how much I was learning.

Placement Exam

Of the three courses I needed to graduate, I was able to place out of two of them. I took German in high school, so I was starting from scratch with Spanish. The exam was certainly over my head, but I had learned enough that I was able to pick my way through the exam. There were more questions using excerpts from books and articles than there were questions about what does this word mean. From my understanding the exam apparently got harder as you answered more questions correctly.

If I had to do my studying all over again I would focus more on doing translations using real world examples from Duolingo. I thought Rosetta Stone did a good job of building a base with it's program and Duolingo did a good job of filling in the gaps. However, I think you could get by with just Duolingo. 

Rosetta Stone does have an online resource to further help your learning. Unfortunately, it's only available for free for a month or two. After that it requires a subscription. I waited too long to try the online resources, so I can't really comment on how effective they are.

Final Thoughts

One thing I wish I had done was watch some movies in Spanish to see how effective that would have been on helping me learn the language. But I've really enjoyed my time studying a new language. It's very satisfying and something I would recommend everyone do. I plan to continue learning Spanish. I just won't be doing it as hot and heavy.

If anyone has a suggestions for resources or want to share their experience learning a new language I would love to read them in the comment section below.

Podcasting tips: editing and processing

Previously, I talked about equipment tips for podcasting. In this post I want to give some basic tips on editing and processing audio files. These are some of the things I’ve learned along the way:

Editing

Always edit from the end of the audio to the beginning, especially if you have time markers for editing. If you start at the beginning and edit to the end you'll change any time markers you set.

Truncate silence is a wonderful option in audacity. Effect -> Truncate Silence and define the amount of space allowed between audio waves. Once the process is started it will remove all the dead air in the audio file. Again, if editing markers are set make sure those are taken care of before hitting truncate silence.

Setting markers. In audacity it’s CTRL + M. It will set a mark during recording for you to go back to later.

Processing

Levelator is great for processing audio: http://web.archive.org/web/20130729204551id_/http://www.conversationsnetwork.org/levelator/

Export the audio as a wave and drop it in the levelator box and it will clean up and level everything in the audio.

Once that's done put the wav file in iTunes and convert it to an MP3 file. Here on instructions on how to set that in iTunes: http://support.apple.com/kb/ht1550

iTunes does a good job of converting wav files to MP3s and is the simplest method I know.

Ask questions or leave any audio editing and processing tips in the comment section below.


Podcasting tips: equipment

was recently asked for some tips on podcasting via email and I decided it would be a good idea to throw them up my website here for anyone else interested. Podcasting can be as simple as recording from your phone and putting it online or as complicated as getting a $300 microphone, a mixer and professional software. How you podcast is based on how much effort you plan to put into it and how much you’re willing to spend. I would suggest starting simple and cheap and then build on that as you get more into it.

Below you’ll find podcasting tips for a single person setup that costs about $50. The person I was giving tips to was for equipment and software ONLY. If you’re planning on podcasting you’ll need to consider hosting options for your audio files.

Get Audacity, a microphone and a headset or earphones.

Audacity is a really good free audio editing software: http://audacity.sourceforge.net/

It's what I use for my podcasts and fairly intuitive to learn.

Just about any mic available will work for recording a voice, whether it's a headset, a built-in laptop microphone or even a phone if it has recording capabilities. Your quality mileage will vary depending on how much is spent on the microphone.

I would recommend audacity, any headset or earphones and an ATR2100 USB mic: http://www.amazon.com/Audio-Technica-ATR2100-USB-Cardioid-Dynamic-Microphone/dp/B004QJOZS4

It's under $50 bucks but will improve the quality of the audio significantly and because it's USB all you have to do is plug it into the computer and go. And because it has an XLR connection it can also be hooked up to other more advanced audio devices. It's the same microphone David, Sean and I use for Crawfish Boxes: Astros Baseball Show. I would also recommend some sort of screen for the microphone. A cheap option would be a simple screen for the microphone. http://www.amazon.com/Stage-Foam-Ball-Type-Windscreen-Black/dp/B0002GXF8Q/ref=sr_1_2?s=musical-instruments&ie=UTF8&qid=1406421196&sr=1-2&keywords=microphone+windscreen

A more expensive option would be to get a desktop mic stand ($15) and a pop filter ($10-15).

$3 is about the cheapest you can go and again will improve the quality of the audio. Something I take very seriously if you hadn’t noticed.

Gaming headset also have decent microphones, but won’t be better than the ATR2100.

Examples:

12th episode:

This is me with a gaming headset.

127th episode:

This is me with the ATR2100.

Now I have refined my editing and audio processing techniques, but this still should give you a good idea on the quality difference in microphones.

Next: editing and processing tips